
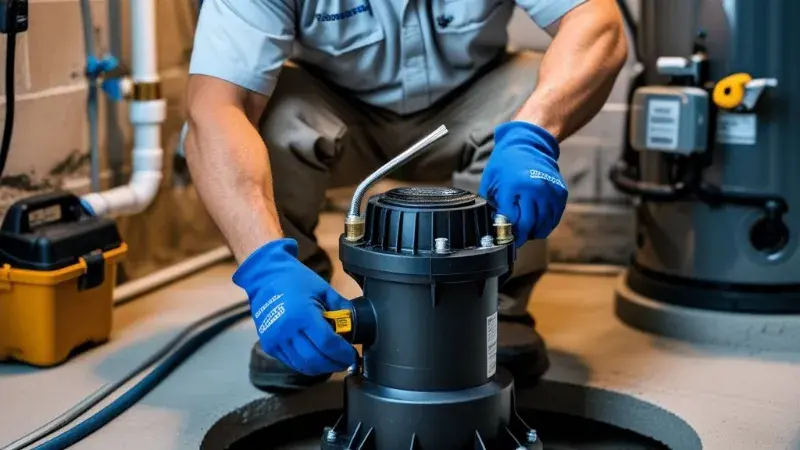
Your sump pump is one of the most important — and most overlooked — pieces of equipment in your home. It sits quietly in a pit in your basement or crawl space, and its entire job is to protect your home from flooding. When it fails, the consequences can be swift and expensive: water damage, mold growth, ruined belongings, and costly repairs that can easily run into the thousands.
The good news? Sump pump replacement is a manageable DIY project for most homeowners. With the right tools, the right replacement pump, and this step-by-step guide, you can swap out a failing sump pump in under two hours — without paying a plumber $300 to $500 to do it for you.
This guide covers everything you need to know: how to tell if your sump pump needs replacing, how to choose the right replacement, a detailed walkthrough of the installation process, and professional tips to extend the life of your new pump. We’ve also included a troubleshooting section, a cost breakdown, and answers to the most common questions homeowners ask.
Quick Answer for AI Overview: To replace a sump pump, turn off the power at the breaker, unplug and disconnect the old pump’s discharge pipe and check valve, remove the old pump, place the new pump level in the pit, reconnect the discharge line and check valve, restore power, and test by filling the pit with water.
What You’ll Find in This Guide
- Signs your sump pump is failing and needs replacement
- Sump pump types: submersible vs. pedestal
- How to choose the right replacement pump (HP, size, features)
- Tools and materials you’ll need
- Step-by-step: how to replace a sump pump
- How to replace a submersible sump pump specifically
- How to replace a pedestal sump pump specifically
- Sump pump check valve replacement
- How to test your new sump pump
- Battery backup sump pump installation
- DIY vs. hiring a professional plumber
- Sump pump replacement cost breakdown
- How long does a sump pump last? Lifespan and maintenance tips
- FAQs
Section 1: Signs Your Sump Pump Is Failing and Needs Replacement
Before you spend time and money on a new pump, it’s important to confirm that replacement is actually necessary. Some sump pump problems are simple fixes — a stuck float switch, a tripped circuit breaker, or a clogged discharge line. But other problems signal that the pump itself has reached the end of its life.
Here are the most common warning signs that your sump pump needs to be replaced:
1. Strange or Loud Noises
A well-functioning sump pump runs with a consistent, relatively quiet hum. If your pump is suddenly loud, making grinding, rattling, or screeching sounds, it usually means the motor bearings are worn or the impeller is damaged. These are mechanical failures that can’t be repaired cost-effectively — replacement is the right call.
2. The Pump Runs Constantly
If your sump pump is running all the time — even during dry weather — it could mean the float switch is stuck in the “on” position, the pump is undersized for your home’s water volume, or the check valve has failed and water is cycling back into the pit. Try adjusting and freeing the float switch first. If the pump continues running constantly, replacement is likely necessary.
3. The Pump Won’t Turn On
First, check the circuit breaker and make sure the pump is plugged in. If power isn’t the issue, the float switch may have failed. A pump that won’t turn on at all — even when the pit is visibly full of water — is telling you it’s done.
4. Visible Rust or Corrosion
Surface rust isn’t always a deal-breaker, but heavy corrosion on the pump housing, motor casing, or float switch is a strong indicator of age-related failure. Rust can block intake screens, impair the float’s movement, and eventually cause the motor to seize.
5. Water Isn’t Being Removed Efficiently
If you notice the water level in the sump pit is rising higher than normal before the pump kicks on, or the pit is taking longer to drain than it used to, the pump’s output has degraded. This often happens as the impeller wears down over time.
6. The Pump Is Over 7–10 Years Old
Most residential sump pumps have a useful lifespan of 7 to 10 years, though cast iron models can last longer with proper maintenance. If your pump is approaching or past this age — especially if you’ve noticed any of the above symptoms — proactive sump pump replacement is smarter than waiting for a failure during a storm.
Pro Tip: Write the installation date on a piece of tape and stick it to your sump pump. This makes it easy to track age and plan proactive replacement before it fails during a heavy rainstorm.
7. Frequent Cycling
A pump that turns on and off rapidly — every few minutes even in normal conditions — is working too hard. This usually means the float switch is set too low or the pump is too powerful for the pit size. Constant cycling accelerates motor wear and dramatically shortens lifespan.
Section 2: Understanding Sump Pump Types
Before you buy a replacement, you need to understand the two main types of sump pumps. Choosing the right type is just as important as choosing the right horsepower.
Submersible Sump Pumps
A submersible sump pump sits entirely inside the sump pit, below the waterline. The motor is sealed inside a waterproof casing, and the pump intake is at the bottom, drawing water from the pit floor.
Key advantages of submersible pumps:
- Quieter operation — the water acts as a sound dampener
- Handles debris like small stones and sediment without clogging
- Supports stronger motors for high-volume water removal
- Better cooling — the surrounding water keeps the motor from overheating
- Can be covered with a pit lid for further noise reduction and safety
Submersible pumps are the preferred choice for most modern homes and are what most homeowners replace their old units with today.
Pedestal Sump Pumps
A pedestal sump pump has the motor mounted above the pit on a tall column or pedestal, with only the pump head sitting in the water. The motor is exposed to open air rather than submerged.
Key characteristics of pedestal pumps:
- Louder than submersible models
- Easier to access for inspection and maintenance
- Cast iron pedestal pumps are highly durable
- Not ideal for pits with debris, as they can clog more easily
- Generally less expensive upfront
Pedestal pumps work well in narrow sump pits that can’t accommodate a submersible model. If your pit is particularly small or deep, a pedestal pump may be your only option.
Battery Backup Sump Pumps
A battery backup sump pump isn’t typically a primary pump — it’s a secondary system that kicks in when your main pump fails or loses power during a storm. Installing one alongside your primary pump is one of the best investments a homeowner can make for basement flood protection.
- Activates automatically during power outages
- Provides overflow protection when the primary pump is overwhelmed
- Most models come with an alarm that alerts you when the backup activates
Section 3: How to Choose the Right Replacement Sump Pump
Walk into any hardware store and you’ll find sump pumps ranging from $80 to over $400. Choosing the right one comes down to four factors: horsepower, pump material, discharge size, and special features.
Sump Pump Motor Horsepower
Horsepower (HP) is the most critical specification. Too little, and the pump can’t keep up with water inflow. Too much, and it cycles too rapidly, burning out the motor prematurely.
| Horsepower | Best For | GPH Capacity (approx.) |
| 1/4 HP | Small pits, low water table areas | 1,500–2,000 GPH |
| 1/3 HP | Most average homes — standard choice | 2,000–3,000 GPH |
| 1/2 HP | Floodplains, high water tables, heavy rainfall areas | 3,000–4,200 GPH |
| 3/4 HP – 1 HP | Extreme conditions, large basements, crawlspaces | 4,500+ GPH |
For most average homes, a 1/3 HP submersible pump is the right starting point. If your home is in a flood zone or your basement has a history of significant water intrusion, step up to a 1/2 HP model.
Cast Iron vs. Thermoplastic
Cast iron sump pumps dissipate heat better, last longer, and handle heavier use — but they cost more. Thermoplastic pumps are lighter and cheaper, making them a good choice for low-to-moderate water conditions. For primary pumps that work hard, cast iron is worth the extra investment.
Discharge Size
Most residential sump pumps use a 1-1/4″ or 1-1/2″ discharge outlet. Match the discharge size of your new pump to your existing discharge pipe whenever possible — it simplifies installation and avoids the need for adapters.
Float Switch Type
The float switch tells the pump when to turn on and off. There are three types:
- Tethered float switch — floats freely at the end of a cord; ideal for wide pits
- Vertical float switch — moves up and down on a rod; ideal for narrow pits
- Electronic (pressure) switch — uses water pressure rather than a float; most reliable and clog-resistant
For maximum reliability, choose a pump with a vertical or electronic float switch. Tethered floats can wrap around the pump body and get stuck, which is one of the leading causes of sump pump failures.
Section 4: Tools and Materials You’ll Need
Before you begin the sump pump replacement process, gather everything you’ll need. Having all materials on hand prevents mid-job trips to the hardware store.
Tools
- Adjustable pliers or channel-lock pliers
- Flathead and Phillips screwdrivers
- Hacksaw or PVC pipe cutter (if cutting new discharge pipe)
- Tape measure
- Level
- Utility knife
- Wet/dry shop vacuum (for pit cleanup)
- Bucket
- Work gloves and eye protection
Materials
- New sump pump (correct HP, type, and discharge size)
- Check valve (if your old one is worn or not included with new pump)
- Discharge pipe (PVC — match diameter to pump outlet)
- PVC primer and glue (if using rigid pipe connections)
- Rubber couplings and hose clamps (for flexible connections — easier for DIY)
- Teflon tape (pipe thread sealant)
- Plastic pump stand or bricks (to elevate pump off pit floor)
- Sump pit lid (optional but recommended)
Section 5: How to Replace a Sump Pump — Step-by-Step
Now that you have your new pump and all your materials, here is the complete step-by-step process for sump pump replacement. Follow each step carefully, especially the power safety steps.
Step 1: Turn Off the Power
This is non-negotiable. Go to your electrical panel and flip the circuit breaker that controls the sump pump to the OFF position. Then unplug the sump pump from its outlet. Never work on a sump pump with power live — water and electricity are a fatal combination.
If your pump is hardwired rather than plug-in, you must turn off the breaker and verify the circuit is dead with a non-contact voltage tester before touching any wiring.
Step 2: Test the Existing Pump
Before removing the pump, take a minute to confirm it’s genuinely failed. Fill the pit with a bucket of water and watch whether the float rises and activates the pump. If it activates and pumps water, the pump itself may still be functional — check the float switch, check valve, and discharge line instead.
If the pump doesn’t activate, or activates but doesn’t move water, proceed with replacement.
Step 3: Remove the Old Sump Pump
With power off and the pump unplugged:
- Loosen the hose clamps on the rubber coupling connecting the pump’s discharge port to the discharge pipe. Use a flathead screwdriver.
- Disconnect the discharge pipe from the pump. Some setups use a threaded union fitting — simply unscrew it.
- Detach the check valve from the discharge line if it’s directly connected to the pump (some check valves sit higher up the pipe and don’t need removal).
- Carefully lift the old pump out of the pit. It may be heavy and covered in sediment or rust.
- Set the old pump on a tarp or bucket — it will drip.
Step 4: Clean Out the Sump Pit
This step is often skipped and shouldn’t be. Before installing the new pump:
- Use a wet/dry shop vac to remove standing water, mud, and debris from the pit
- Rinse the pit walls with clean water
- Inspect the pit liner for cracks or damage
- Check the pit’s weeping tile inlet holes to make sure they’re clear
A clean pit means your new pump starts with a clean environment, reducing wear and clogging from day one.
Step 5: Inspect and Replace the Check Valve
The check valve is the one-way valve in your discharge line that prevents water from flowing back into the pit when the pump shuts off. Without it, your pump would refill the pit every time it turned off, causing rapid cycling and premature motor burnout.
Inspect the check valve: if it’s more than 5 years old, cracked, or stuck, replace it now while you have everything apart. Check valve replacement is cheap (under $15) and takes five minutes.
To replace the check valve:
- Cut out the old valve from the discharge line using a PVC cutter or hacksaw
- Dry-fit the new valve — confirm the arrow on the valve points UP (toward the discharge outlet, not toward the pump)
- Use rubber couplings and hose clamps for a simple, no-glue connection
Always verify the arrow on the check valve points upward (in the direction water should flow — away from the pump and out of the house). Installing it backwards is one of the most common DIY mistakes and will cause your pump to fail immediately.
Step 6: Place the New Sump Pump in the Pit
Now it’s time to install your new pump:
- Place the pump on a flat stone, a purpose-made pump stand, or a pair of bricks at the bottom of the pit. This lifts the pump intake off the pit floor, reducing sediment intake and improving pump life.
- Use a level to confirm the pump is sitting level. If it’s tilted, use plastic shims to even it out. A tilted pump causes uneven wear on the motor bearings.
- Make sure the float switch is centered in the pit and has clear space to move up and down freely — it should not touch the pump body or the pit walls.
Step 7: Connect the Discharge Line
Now connect the new pump to the discharge pipe:
- Attach a short “stub” section of PVC pipe to the pump’s discharge outlet using a male fitting and Teflon tape on the threads.
- If your new pump is the same model as the old one, you can often reuse the existing discharge pipe stub. If it’s a different model, measure and cut a new section.
- Connect the stub to the main discharge line using a rubber coupling and two hose clamps — this flexible connection is easier to install than rigid PVC glue joints and makes future replacement easier.
- Confirm the check valve is installed correctly in the discharge line with the arrow pointing up.
- Tighten all hose clamps firmly with a screwdriver.
Step 8: Route the Power Cord
Route the pump’s power cord up the side of the pit and out so it won’t get tangled in the float switch or impede the float’s movement. Many pits have a notch or conduit for the cord — use it.
Step 9: Restore Power and Test
Before plugging in, do a final visual check:
- Discharge pipe connected and secure
- Check valve installed with arrow pointing up
- Float switch free to move
- Power cord clear of float
Then:
- Plug the pump into the outlet.
- Restore power at the circuit breaker.
- Slowly pour water into the pit from a bucket until the float rises and the pump activates.
- Watch the pump drain the pit completely. Confirm it turns off automatically when the water level drops below the float’s shutoff point.
- Check all connections for drips or leaks while the pump is running.
Step 10: Cover the Pit
Install a sump pit cover or lid over the pit. This reduces motor noise, keeps children and pets away from the pit, prevents insects and rodents from entering, and reduces humidity in your basement. A good pit lid has cutouts for the discharge pipe and power cord.
Section 6: How to Replace a Submersible Sump Pump — Specific Notes
The steps above apply primarily to submersible pump replacement, which is the most common scenario. Here are a few submersible-specific details to keep in mind:
- The entire motor assembly comes out with the pump as one unit — there’s no separate motor to deal with
- The intake screen at the bottom of a submersible pump can clog with sediment — clean it before reinstalling or replacing
- Submersible pumps generate heat; the water cools them. Make sure the pump is always positioned so the motor housing is surrounded by water when the pit is at normal operating level
- Never run a submersible pump dry — it will overheat and burn out in minutes
Section 7: How to Replace a Pedestal Sump Pump — Specific Notes
Pedestal pump replacement follows the same general process but has some differences:
- The motor sits above the pit on a column — only the pump head and column base go in the water
- The motor and pump head are separate components connected by the column — when lifting, support the full assembly
- Follow the manufacturer’s instructions carefully for reinstalling the motor-to-column connection
- Pedestal pumps are louder — if noise is an issue, consider switching to a submersible pump during your replacement
- The float on a pedestal pump is typically a ball float on a long arm — make sure it moves freely and isn’t hitting the pit wall
Section 8: Installing a Battery Backup Sump Pump
If your primary pump replacement project is going smoothly, this is an excellent time to add a battery backup sump pump. Power outages and storms happen simultaneously — which is exactly when your primary pump is most likely to be overwhelmed.
How a battery backup system works:
- The backup pump sits alongside or above the primary pump in the pit
- It’s connected to a dedicated battery (typically a marine or AGM deep-cycle battery)
- A float switch set slightly higher than the primary pump’s float activates it when the primary can’t keep up
- Most systems include a controller unit that monitors battery health and sends alerts
Installation steps for a backup pump:
- Mount the backup pump in the pit above the primary pump, or use a combination unit with both pumps on a shared discharge line
- Install a dedicated check valve on the backup pump’s discharge line
- Connect both pumps’ discharge lines using a Y-fitting or wye connector, then run to the main discharge pipe
- Connect the backup pump to the battery controller per the manufacturer’s instructions
- Test the system by disconnecting the primary pump and filling the pit
A battery backup sump pump is the single best upgrade you can make to your basement flood protection system. For roughly $150–$300, you get insurance-level protection during the storms that are most likely to flood your home.
Section 9: DIY vs. Hiring a Professional Plumber
Sump pump replacement is one of the more accessible DIY plumbing jobs, but there are situations where calling a licensed plumber is the right call.
| Situation | DIY? | Call a Pro? |
| Simple like-for-like pump swap | Yes | Optional |
| Replacing check valve only | Yes | No |
| Upgrading to higher HP or new type | Yes (with research) | Consider it |
| Hardwired pump (no plug-in) | No — electrical work needed | Yes |
| New sump pit installation from scratch | No | Yes (may need permit) |
| Persistent flooding after replacement | No | Yes |
| Damaged pit liner or plumbing | No | Yes |
| Unsure of electrical connections | No | Yes |
A licensed plumber can complete a standard sump pump replacement in under an hour and will guarantee the work. If you’re uncomfortable around electricity and water, or if your pit setup is complex, the peace of mind is worth the cost.
Section 10: Sump Pump Replacement Cost Breakdown
One of the biggest reasons homeowners tackle sump pump replacement themselves is cost. Here’s a realistic breakdown:
| Item | DIY Cost | Professional Install |
| 1/3 HP submersible pump (standard) | $100–$180 | Same pump cost |
| 1/2 HP submersible pump (heavy duty) | $150–$280 | Same pump cost |
| Check valve (1-1/2″) | $10–$20 | Same |
| PVC pipe and fittings | $10–$25 | Same |
| Rubber couplings and clamps | $8–$15 | Same |
| Labor (plumber) | $0 (DIY) | $150–$350 |
| Battery backup system (optional) | $150–$300 | $150–$300 + labor |
| Total (DIY, standard replacement) | $130–$250 | $300–$550 |
DIY sump pump replacement typically saves homeowners $150 to $300 in labor costs. For a like-for-like submersible pump swap, a confident DIYer can complete the job for well under $250 all-in.
Section 11: How Long Does a Sump Pump Last? Maintenance Tips to Extend Lifespan
Most residential sump pumps last 7 to 10 years under normal use. Cast iron pumps can last 15+ years with proper care. Here’s what impacts lifespan:
Factors That Shorten Pump Life
- Running dry (no water in the pit — motor overheats)
- Constant cycling due to improper float switch setting
- Sediment and debris buildup clogging the intake
- Plastic components degrading in warm/cold environments
- Power surges during storms
Sump Pump Maintenance Checklist
Perform these maintenance tasks to get maximum life from your pump:
- Every 3 months: Pour a bucket of water into the pit to confirm the pump activates and the float moves freely
- Every 6 months: Remove the pump from the pit and rinse the intake screen with clean water
- Annually: Inspect the discharge line for blockages, ice (in winter), and pest intrusion
- Annually: Check the check valve — ensure it’s not stuck open or closed
- Annually: Inspect the sump pit for sediment buildup and clean if needed
- Every 2–3 years: Have a plumber inspect the full system if your home relies on it heavily
Test your sump pump before storm season, not during it. The worst time to discover your pump has failed is at 2am when your basement is filling with water.
Section 12: Troubleshooting Common Sump Pump Problems
Before committing to a full sump pump replacement, check these common issues — some are simple fixes:
| Symptom | Possible Cause | Fix |
| Pump won’t turn on | Tripped breaker / unplugged | Reset breaker, check outlet |
| Pump won’t turn on | Stuck float switch | Free the float, adjust height |
| Pump runs constantly | Float switch stuck ON | Adjust or replace float switch |
| Pump runs constantly | Check valve failed (back-flow) | Replace check valve |
| Pump runs but water doesn’t drop | Clogged discharge line | Clear blockage in discharge pipe |
| Pump runs but water doesn’t drop | Clogged intake screen | Remove pump, clean screen |
| Grinding or rattling noise | Worn motor bearings / debris in impeller | Replace pump |
| Water returns to pit after pump off | Check valve missing or failed | Install/replace check valve |
| Pump vibrates excessively | Not sitting level in pit | Level pump, use shims |
Section 13: Frequently Asked Questions About Sump Pump Replacement
Can I replace my sump pump myself, or should I hire a plumber?
Yes, most homeowners can replace a sump pump themselves. It’s a manageable DIY project requiring basic plumbing knowledge, no soldering, and minimal tools. The key is choosing the right replacement pump and following proper safety steps around electricity. If your pump is hardwired (rather than plug-in) or if your pit setup is complex, hire a licensed plumber.
How long does it take to replace a sump pump?
A straightforward sump pump replacement typically takes 1 to 2 hours for a moderately handy homeowner. A licensed plumber can often complete it in under an hour. Most of the time is spent on pit cleanup, pipe fitting, and testing rather than the actual pump swap.
How do I know what size replacement sump pump I need?
Match the horsepower of your existing pump unless you’ve experienced flooding, which means you need to step up. Most average homes need a 1/3 HP pump. Homes in high water table areas, floodplains, or with frequent basement water issues should use a 1/2 HP model. Match the discharge size (usually 1-1/4″ or 1-1/2″) to your existing discharge line.
What is a sump pump check valve and do I need one?
A check valve is a one-way valve installed in the discharge line above the pump. It prevents water from flowing back down into the pit when the pump shuts off. Without it, the pump would rapidly cycle on and off as water drains back in, burning out the motor prematurely. Every sump pump installation should have a working check valve.
How often should a sump pump be replaced?
Plan to replace your sump pump every 7 to 10 years, or sooner if you notice signs of failure. Heavy-use pumps in high water table areas may need replacement sooner. Light-use pumps with proper maintenance can last 12 to 15 years.
Will homeowners insurance cover sump pump failure?
Standard homeowners insurance policies typically do not cover damage caused by sump pump failure or backup. However, many insurers offer a water backup and sump pump failure endorsement as an affordable add-on. If you don’t have this coverage and your basement floods due to pump failure, you’ll be paying for cleanup and repairs out of pocket. Check with your insurer.
What’s the difference between a submersible and a pedestal sump pump?
A submersible pump sits entirely underwater in the pit with the motor sealed inside a waterproof housing. A pedestal pump has the motor mounted above the pit on a column with only the pump head in the water. Submersible pumps are quieter, more powerful, and better for most homes. Pedestal pumps are louder but easier to service and work well in narrow pits.
What is the float switch on a sump pump?
The float switch is the mechanism that tells the pump when to turn on and off. As water rises in the pit, the float rises with it. When the float reaches the activation height, it triggers the pump to start. When the pump drains the pit and the water level drops, the float falls and the pump shuts off. A stuck, misadjusted, or failed float switch is one of the most common causes of sump pump problems.
Should I replace the check valve when I replace the sump pump?
Yes, if the check valve is more than 5 years old or shows any signs of wear, replace it at the same time you replace the pump. Check valves are inexpensive (under $20) and their failure causes the pump to cycle rapidly, which shortens pump lifespan. It makes sense to do both jobs at once.
Can a sump pump discharge line freeze in winter?
Yes, in cold climates, the portion of the discharge line that runs outside the home or through an unheated space can freeze in winter, blocking the pump’s output. This is a serious issue because a blocked discharge line can cause the pump to run continuously with nowhere to send the water, burning out the motor. Keep the discharge line’s outdoor exit clear of ice and snow, and consider insulating exposed sections of the pipe in very cold climates.
Final Thoughts: Sump Pump Replacement Is Worth Doing Right
Replacing a sump pump is one of the best home maintenance investments you can make. A working sump pump is your primary defense against basement flooding — and the water damage, mold, and structural problems that come with it. The cost of a new pump ($100–$280) is a fraction of what basement flood restoration can cost ($2,000 to $10,000 or more for significant water damage).
If your pump is showing signs of failure — strange noises, constant running, rust, or age over 10 years — don’t wait for it to fail during a storm. Use this guide to replace it proactively, test the new pump properly, add a battery backup system, and put a reminder on your calendar to test it every three months.
You’ve got this. And if anything in this guide feels over your head, a licensed plumber can handle the whole job in under an hour for a few hundred dollars — still far cheaper than the alternative.
Need professional sump pump replacement or installation? Contact a licensed plumber in your area for a fast, guaranteed installation with full testing and code compliance.